Set up your Sol1 email account in Apple Mail

Note: This is for email accounts that are included in a Solutions First Hosting Package. For Zimbra email setup, see the Zimbra Guide.
  • Open Apple Mail.
  • If this is the first time you’ve opened Apple Mail, it will immediately prompt you to choose a Mail account provider.
  • If you already use Mail for other accounts, click on Mail > Preferences > Accounts and add a new account.
  • Select Other Mail Account.
  • Click Continue.
    email applemail 1 Email Setup - Apple Mail

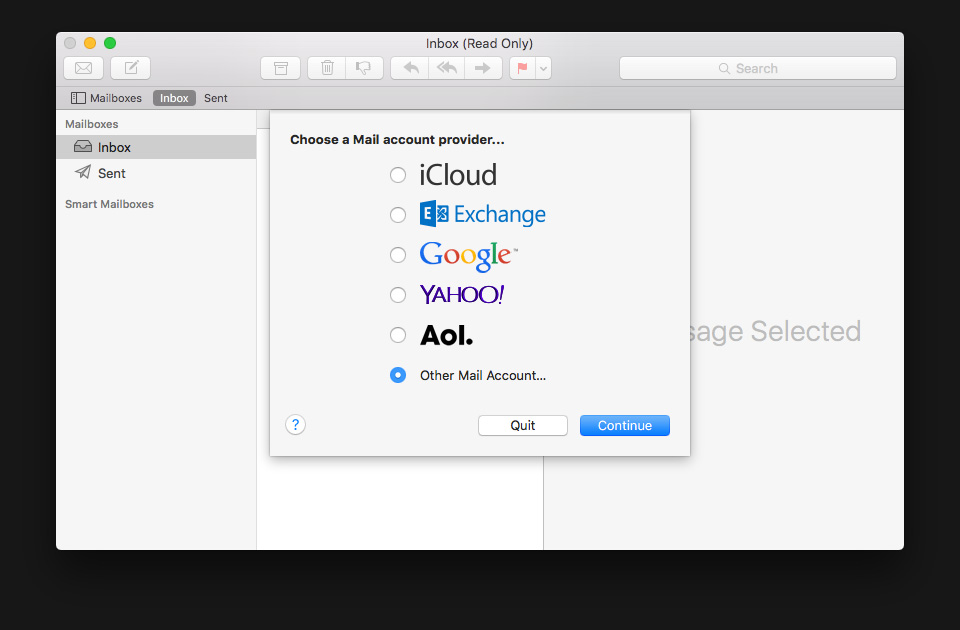
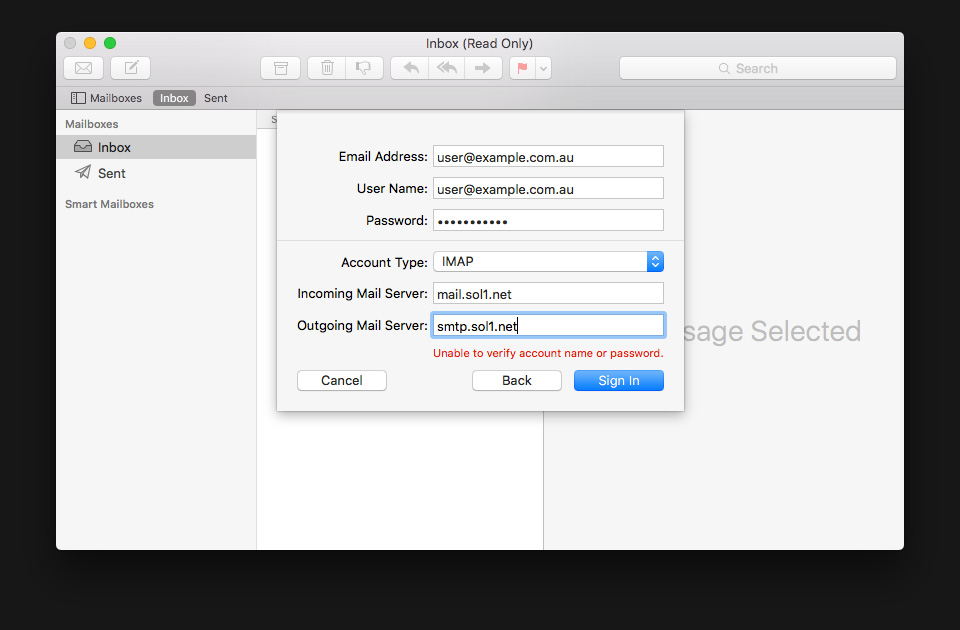
Apple Mail will now prompt you for your information.

  • Enter your Name as you would like it to appear on outgoing mail.
  • Enter your full Email Address
  • Enter your email Password.
  • Click Sign In.
    email applemail 2 Email Setup - Apple Mail

Mail may give you an error that it is Unable to verify your account name and password. You will need to fill in the following details:

  • Account TypeIMAP
  • Incoming Mail Server: mail.sol1.net
  • Outgoing Mail Server: smtp.sol1.net
  • Click Sign In.
    email applemail 3 Email Setup - Apple Mail

A summary page will ask you to confirm your information and choose what Apps you would like to use with your mail account.

When ready, click Done.
email applemail 4 Email Setup - Apple Mail

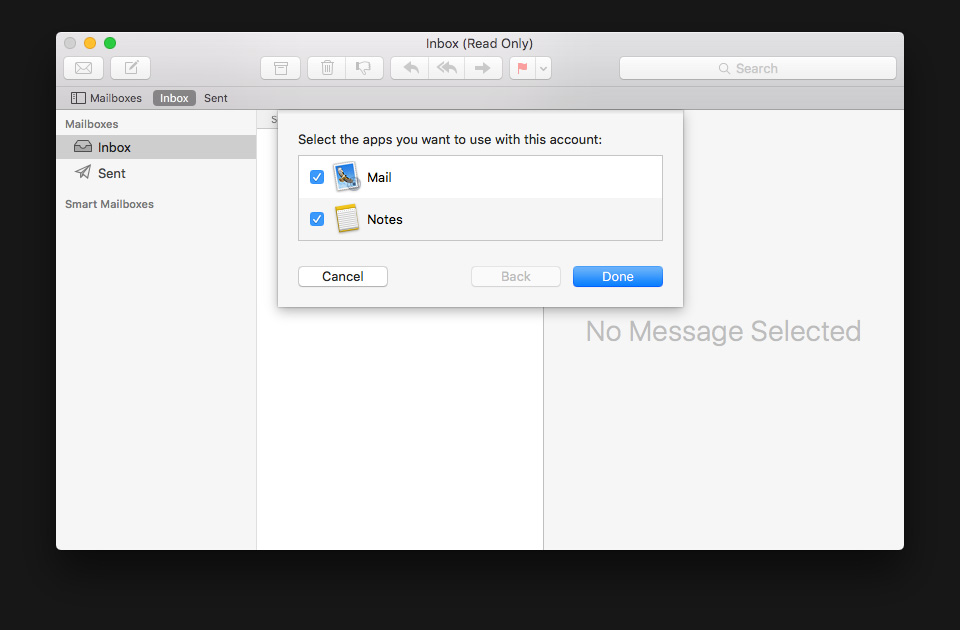
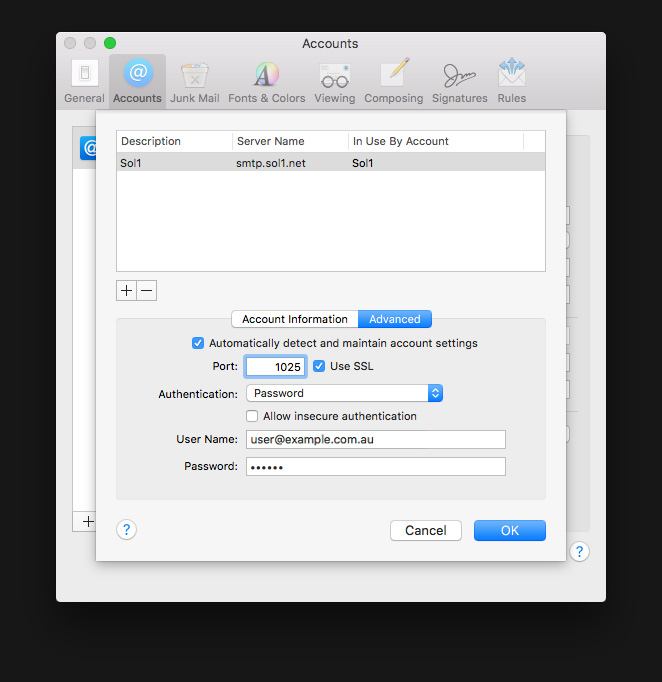
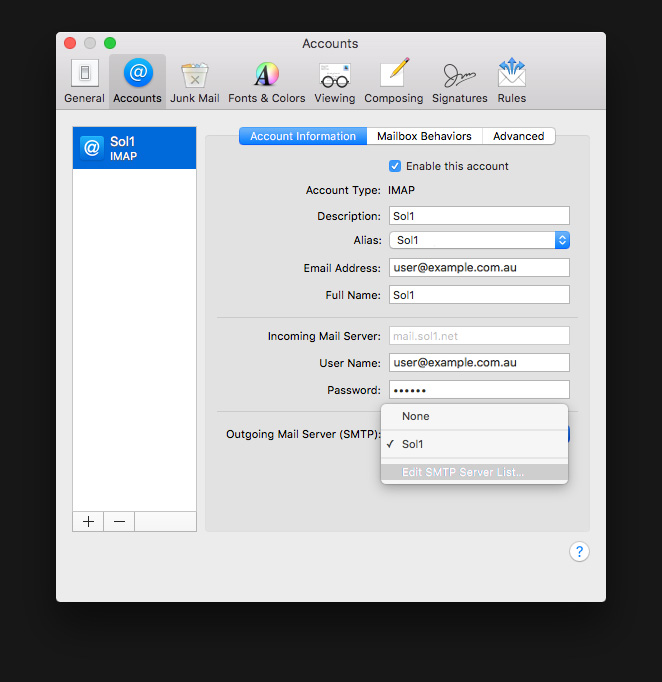
You will now be able to receive mail, but before you can send mail, you’ll need to adjust the outgoing mail settings.

  • On the menu bar, navigate to Mail > Preferences.
  • On the Accounts tab, click the dropdown next to Outgoing Mail Server (SMTP) and select Edit SMTP Server List.
    email applemail 5 Email Setup - Apple Mail
  • Click Advanced.
  • Set Port to 1025 and tick the box to Use SSL.
  • For Authentication select Password.
  • For User Name, type your full email address.
  • Type your email Password.
  • Click OK.

That’s it! You may now begin using Apple Mail.
email applemail 6 Email Setup - Apple Mail

Scroll to Top

Choose platform

Please select your platform to download the appropriate AnyDesk remote session tool